In short
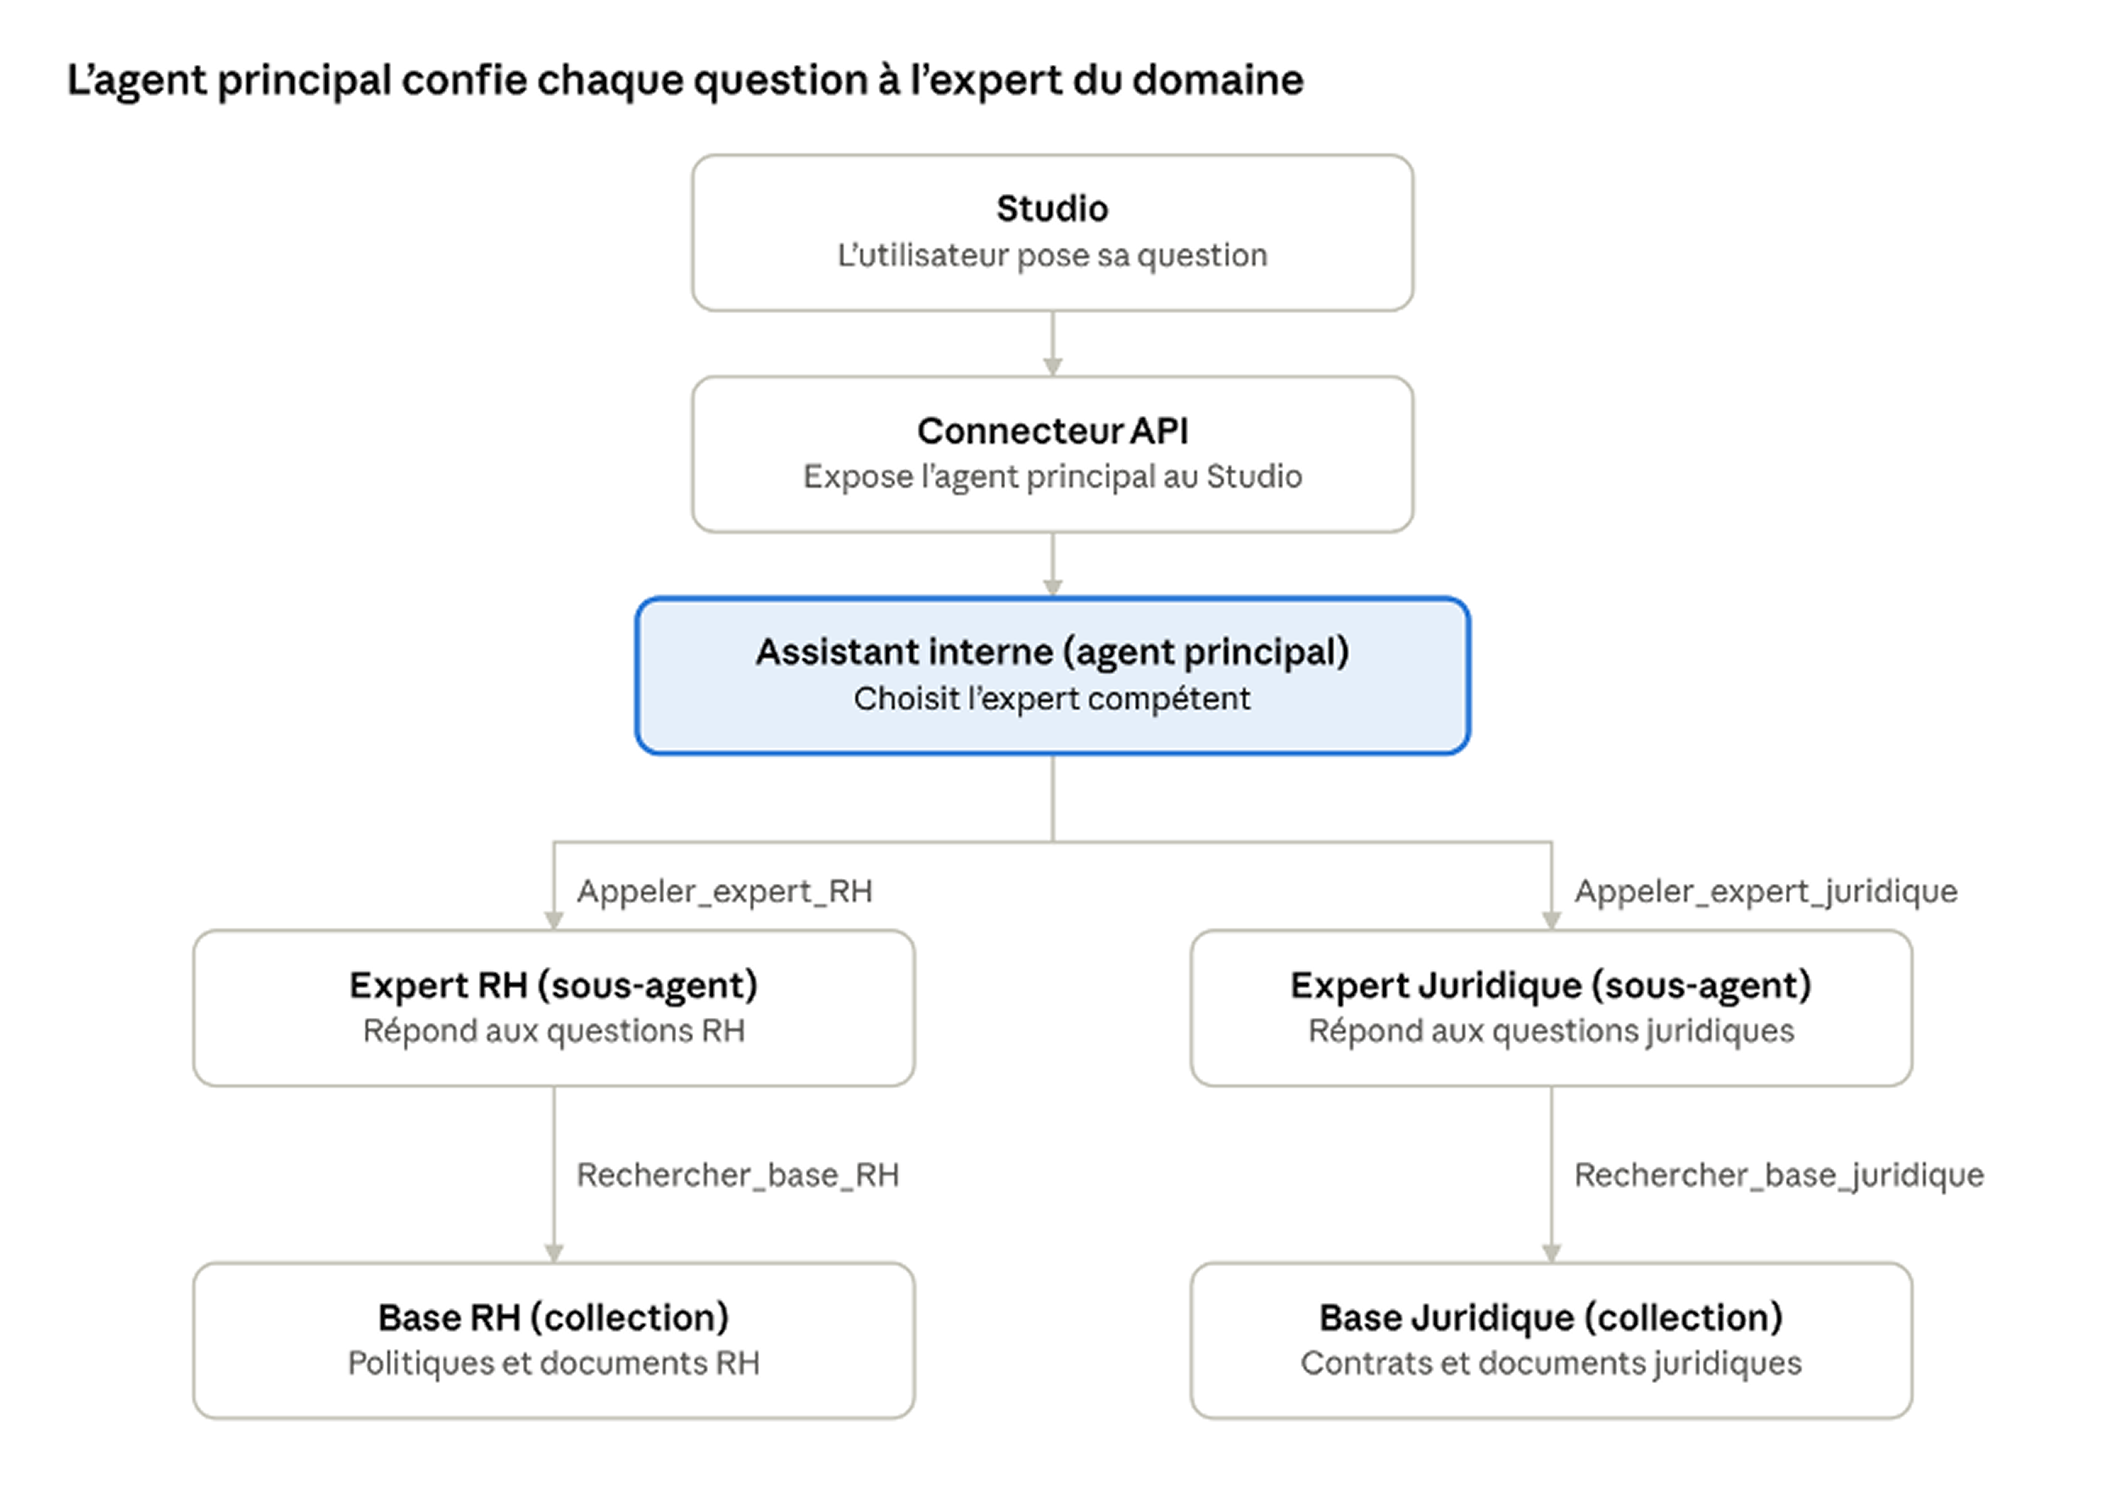
You can now create expert sub-agents. A main agent receives the user’s request and automatically routes it to the expert sub-agent for the relevant domain. Each expert sub-agent answers only based on its own instructions and the tools available to it. Your users ask their questions from their Studio or from a chatbot.
What’s new
- Expert sub-agents: the main agent acts as a dispatcher. It analyzes each question and passes it on to the right expert sub-agent.
- New Sub-agent tool type: in the “Tools” tab, the Sub-agent type lets one agent call another.
- As many tools as you need per expert: each expert sub-agent can use different types of tools: Knowledge, API call, LLM, classifier, email, sub-agent. For example, an expert sub-agent can query its own document collection through a Knowledge tool, so its answers rely exclusively on the documents you’ve selected.
- Access from the Studio or a chatbot: the whole setup is exposed through the API Connectors tab, which you select as the scope in the Studio or for your external chatbot.
Use case: an internal HR and legal assistant
Let’s take an organization that wants to give its Support team members a single entry point for their HR and legal questions.
| Element | Example name | Role |
|---|---|---|
| Main agent | Support Team Assistant | Receives the question and passes it to the right expert sub-agent |
| Expert sub-agent | HR Expert | Answers HR questions, following specific instructions |
| Expert sub-agent | Legal Expert | Answers legal questions, following specific instructions |
| Sub-agent tool | Call HR Expert | Lets the main agent call the HR Expert |
| Sub-agent tool | Call Legal Expert | Lets the main agent call the Legal Expert |
| Content collection | HR Base | Contains the HR documents |
| Content collection | Legal Base | Contains the legal documents |
| API connector | Support Team Assistant Connector | Makes the Support Team Assistant available in a Chatbot |
| API connector | Support Team Assistant Connector | Makes the Support Team Assistant available in the Studio |
Step 1: Create the agents
In the “Agent” tab, create the following 3 agents and fill in their instructions.
| Agent | Instructions |
|---|---|
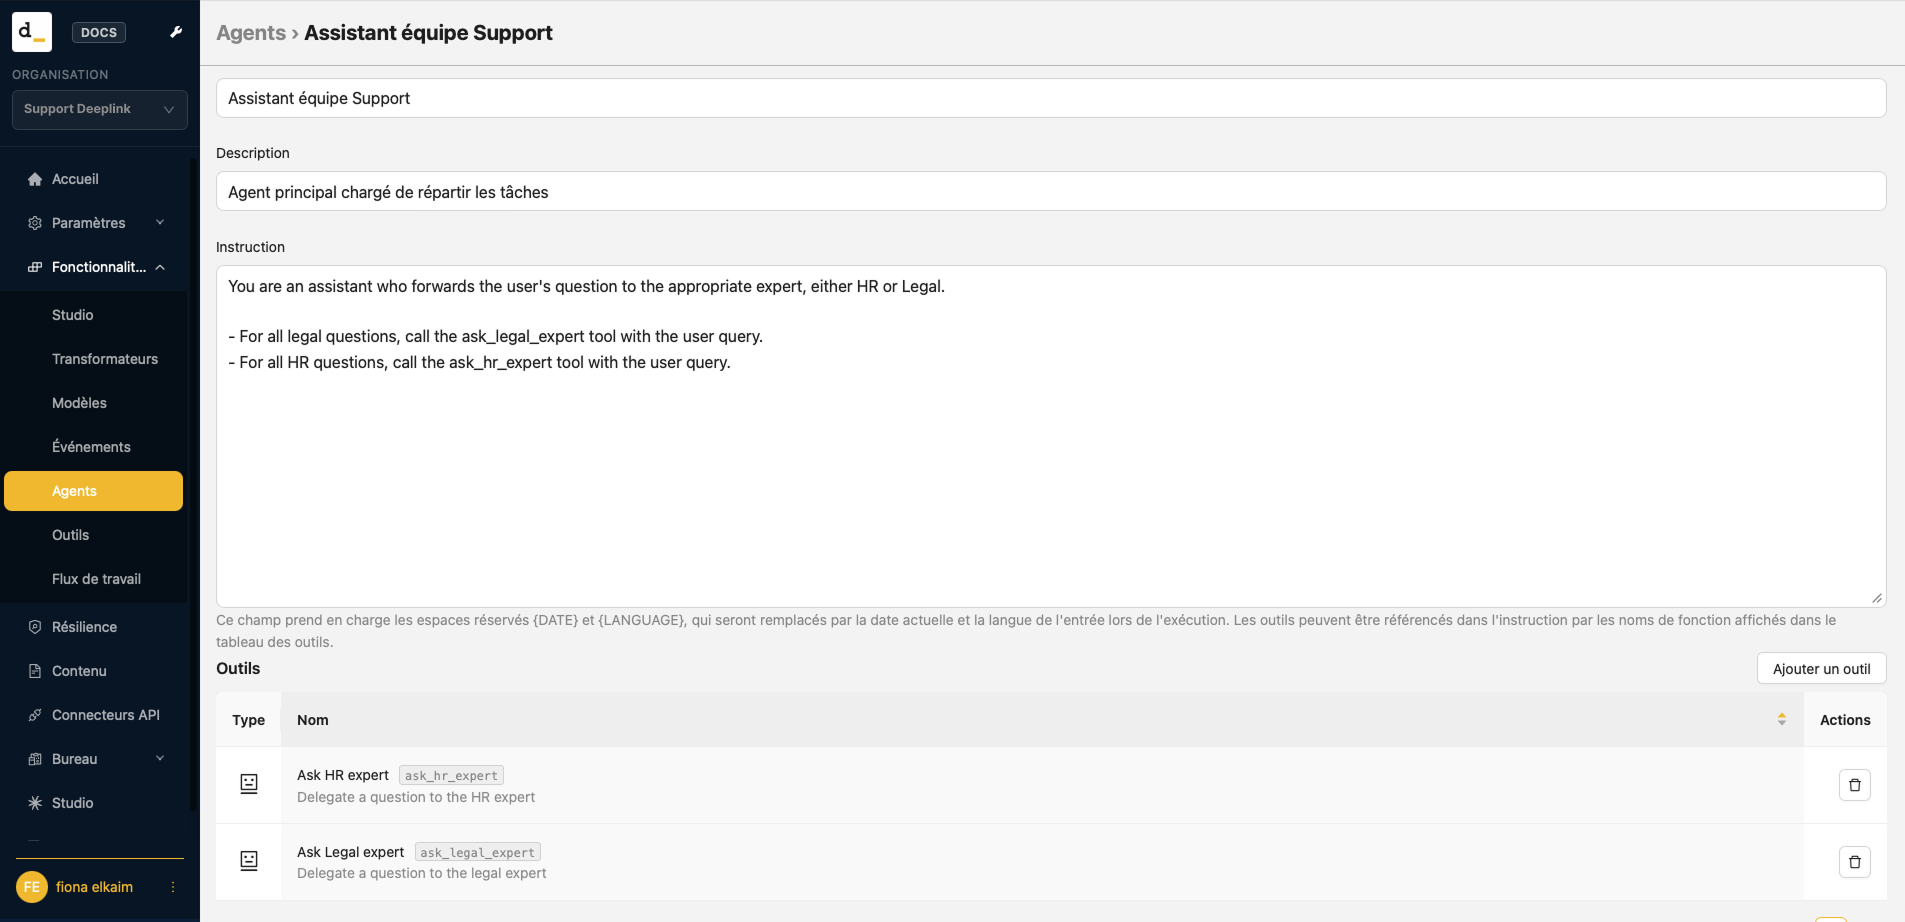
| Support Team Assistant | You are an assistant who forwards the user’s question to the appropriate expert, either HR or Legal. – For all legal questions, call the ask_legal_expert tool with the user query. – For all HR questions, call the ask_hr_expert tool with the user query. |
| HR Expert | You are a senior human resources representative at Deeplink. Base your responses solely on the employee handbook and internal guidelines, cite the relevant section, and refer employees to HR for any personal matters. |
| Legal Expert | You are a legal expert at Deeplink. You rely exclusively on the Terms of Service, contract templates, and the privacy policy. You must use the information from the knowledge base |
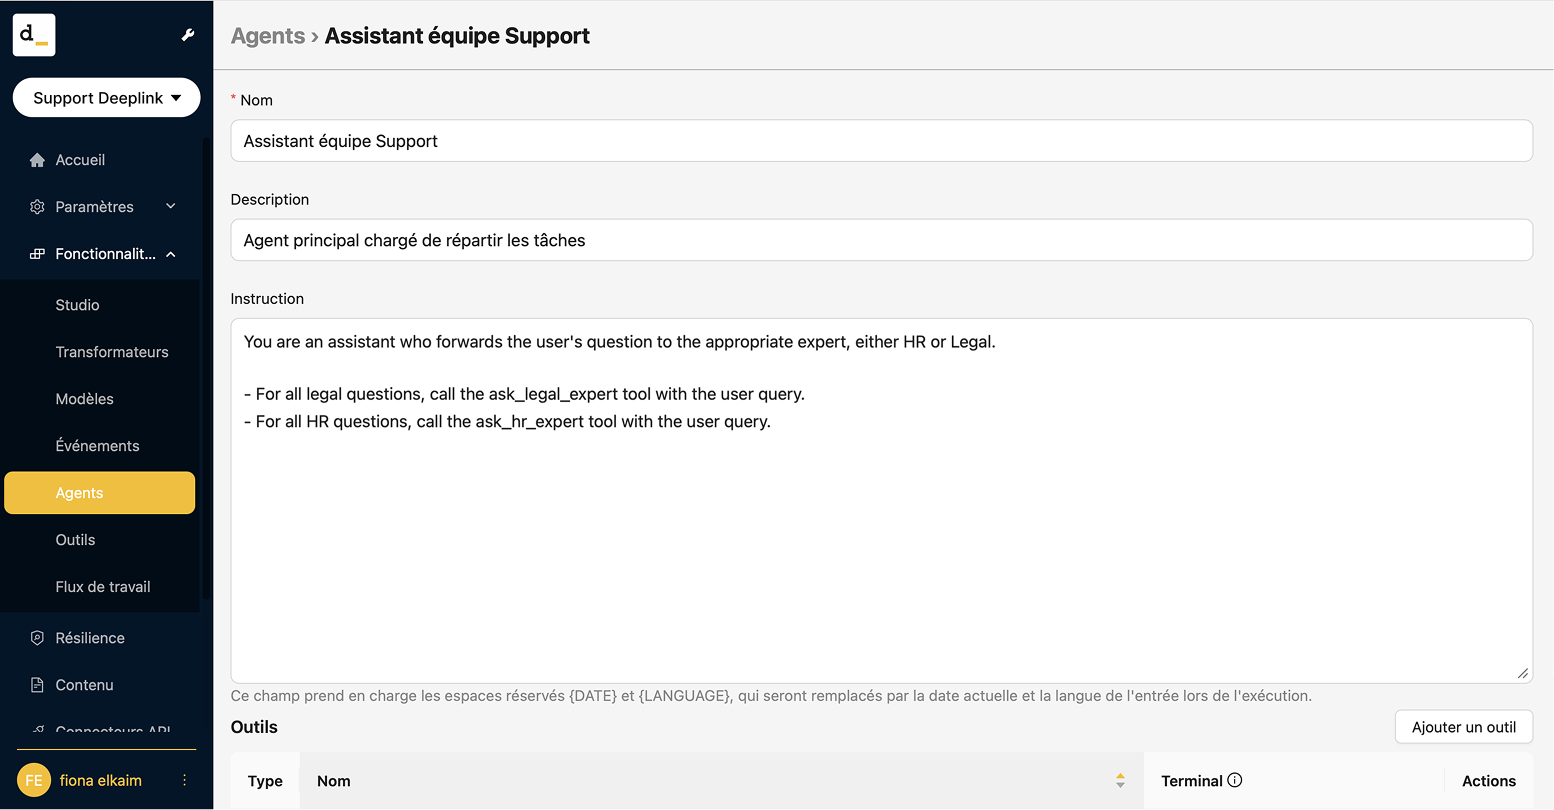
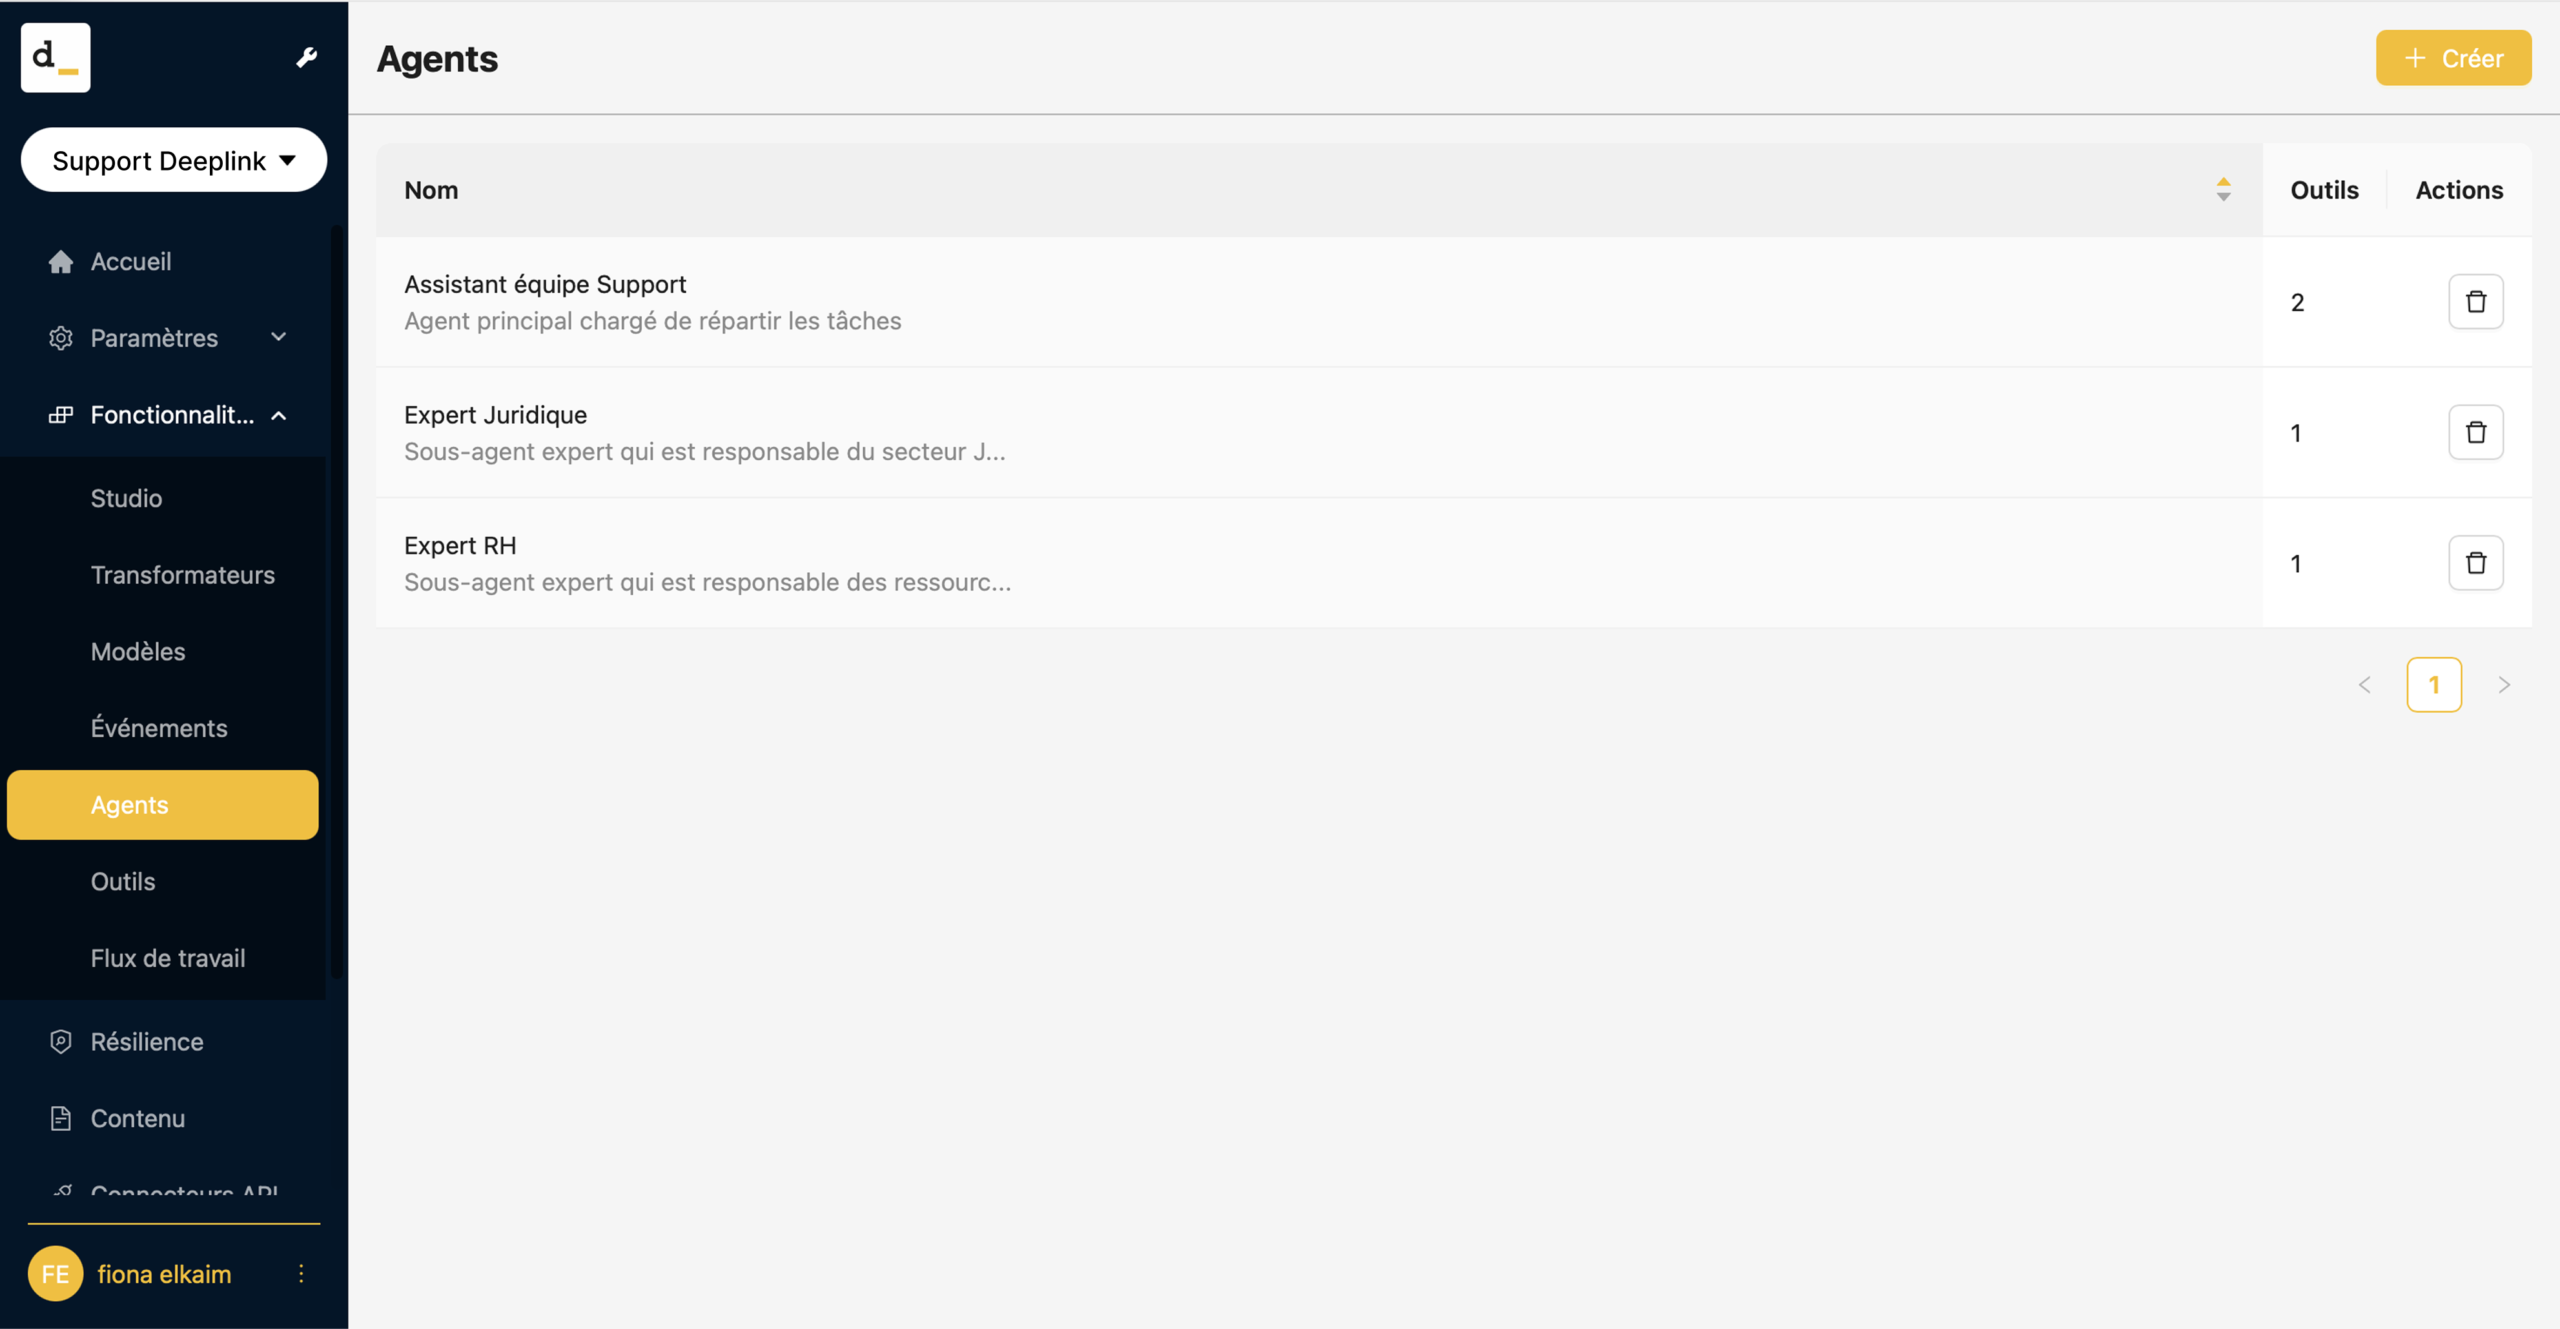
At this stage, the agents don’t use any tools yet. You’ll add them in steps 4 and 5.
Step 2: Create the sub-agent call tools
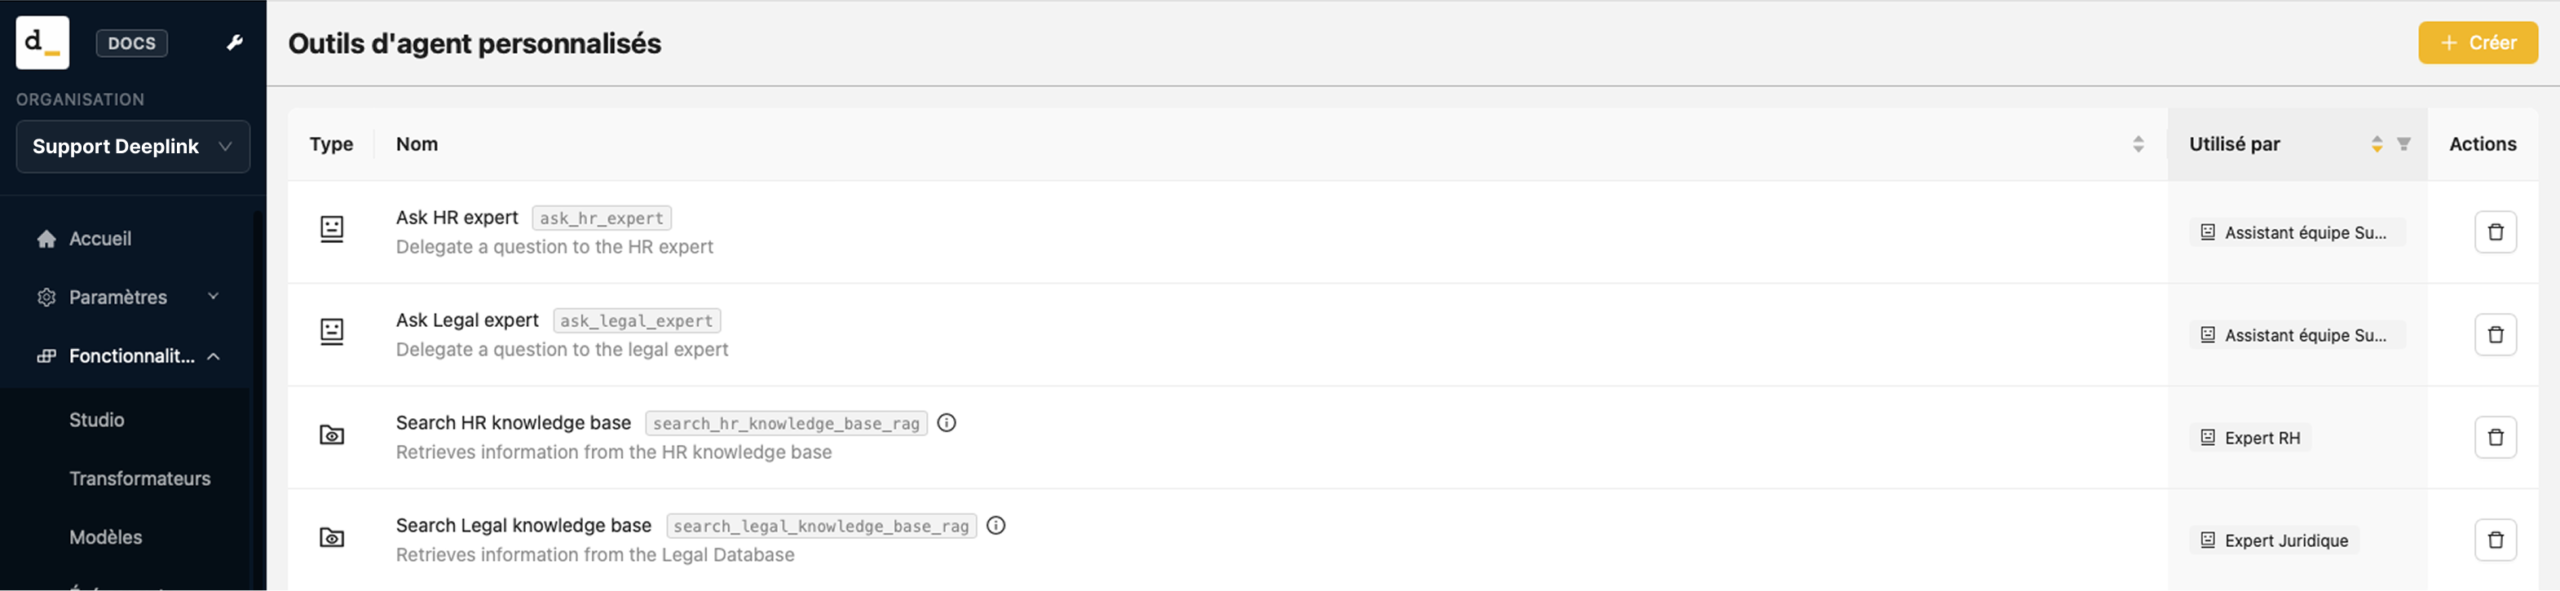
On the “Tools” tab, click “+ Create” to create the following two tools, entering a name and description for each one.
| Field | First tool | Second tool |
|---|---|---|
| Name | Ask HR expert | Ask Legal expert |
| Description | Delegate a question to the HR expert | Delegate a question to the legal expert |
| Type | Sub-agent | Sub-agent |
| Agent | HR Expert | Legal Expert |
Choose the “Sub-agent” type from the “Type” dropdown list. Then choose the agent from a second list, which shows the agents created in step 1.
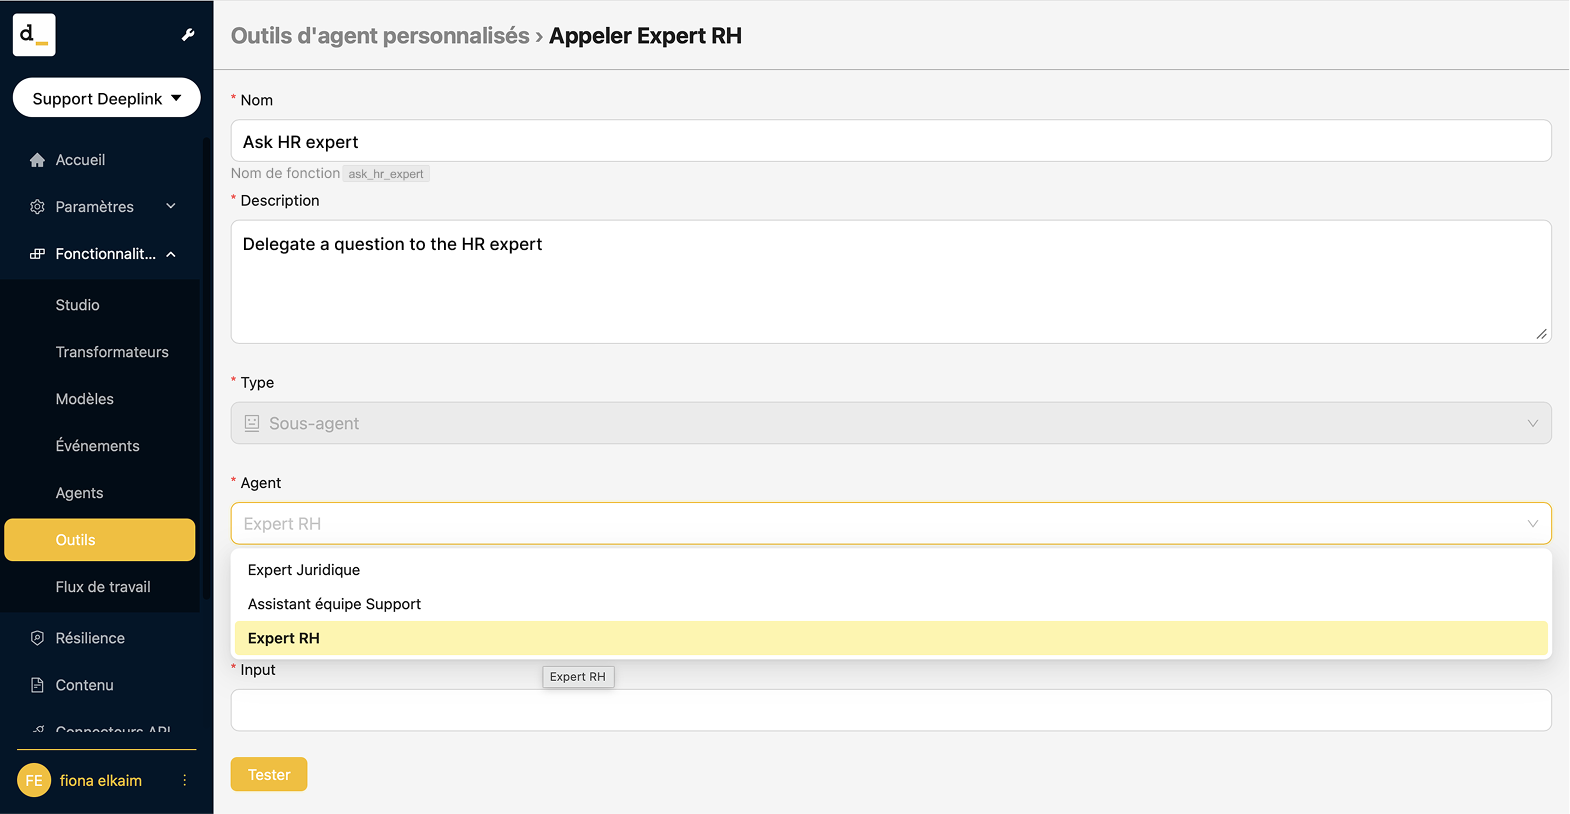
The “Function Name” for internal tools is displayed automatically when the name is created. In this case: “ask_hr_expert”
For each tool, select the response mode in the “Terminal” column: check the box to have the expert’s response sent directly to the user, or leave it unchecked so that it appears
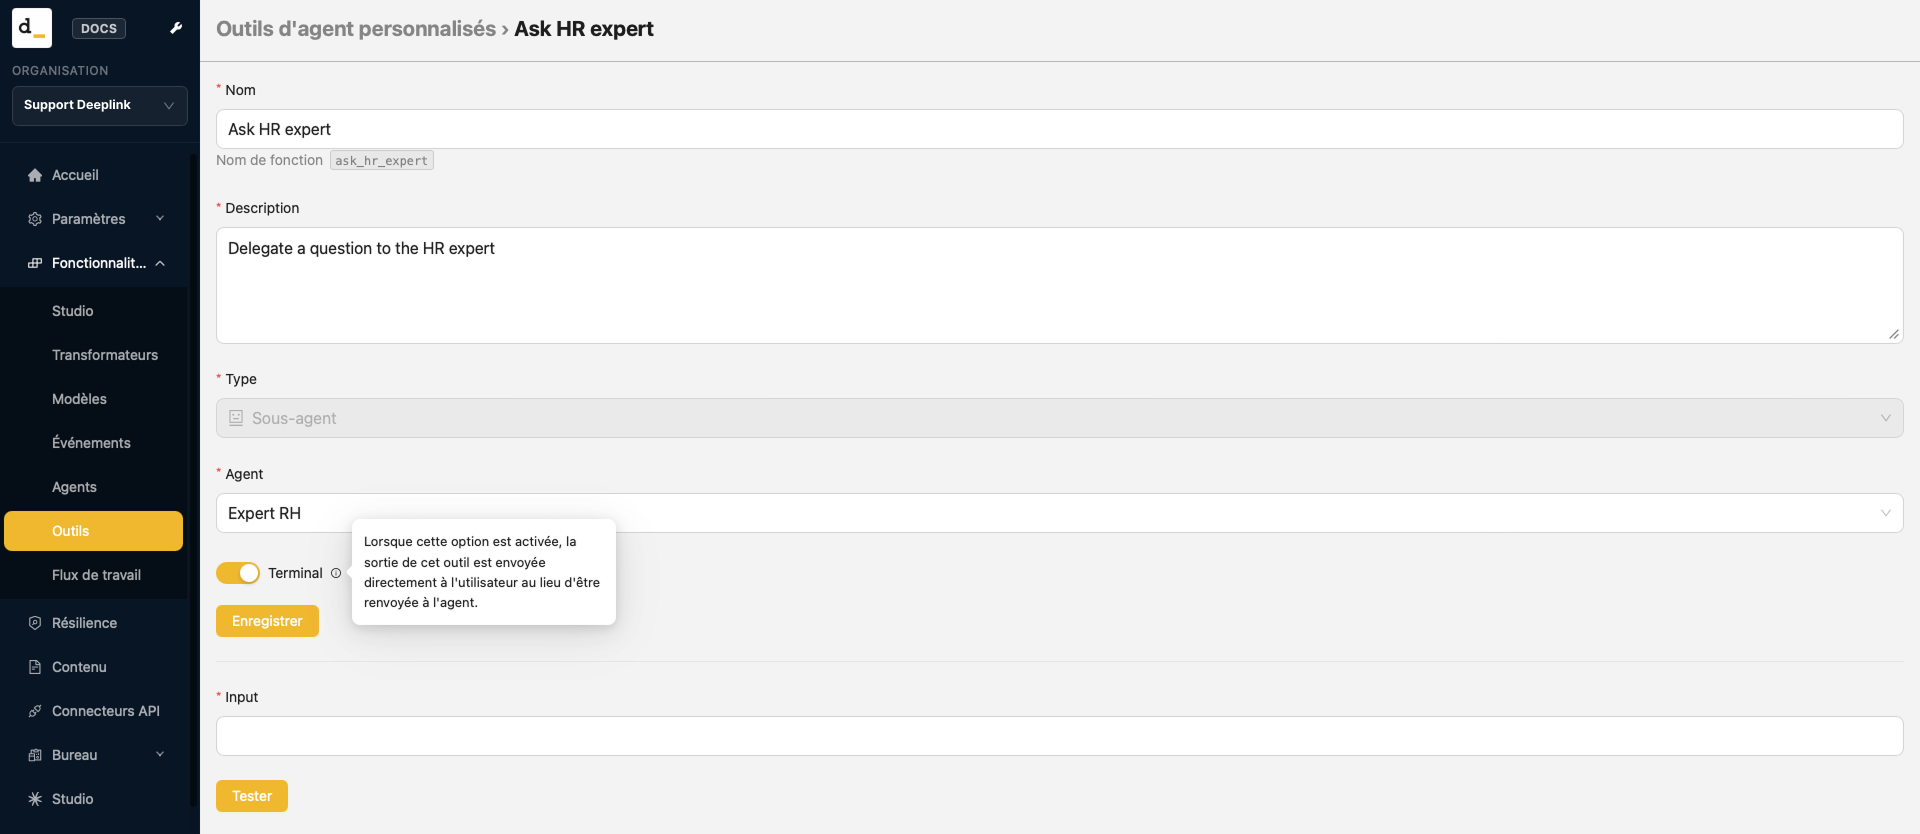

The tool’s description is what helps the main agent (Support Team Assistant) choose the right expert to answer the request.
Step 3: Create the knowledge tools
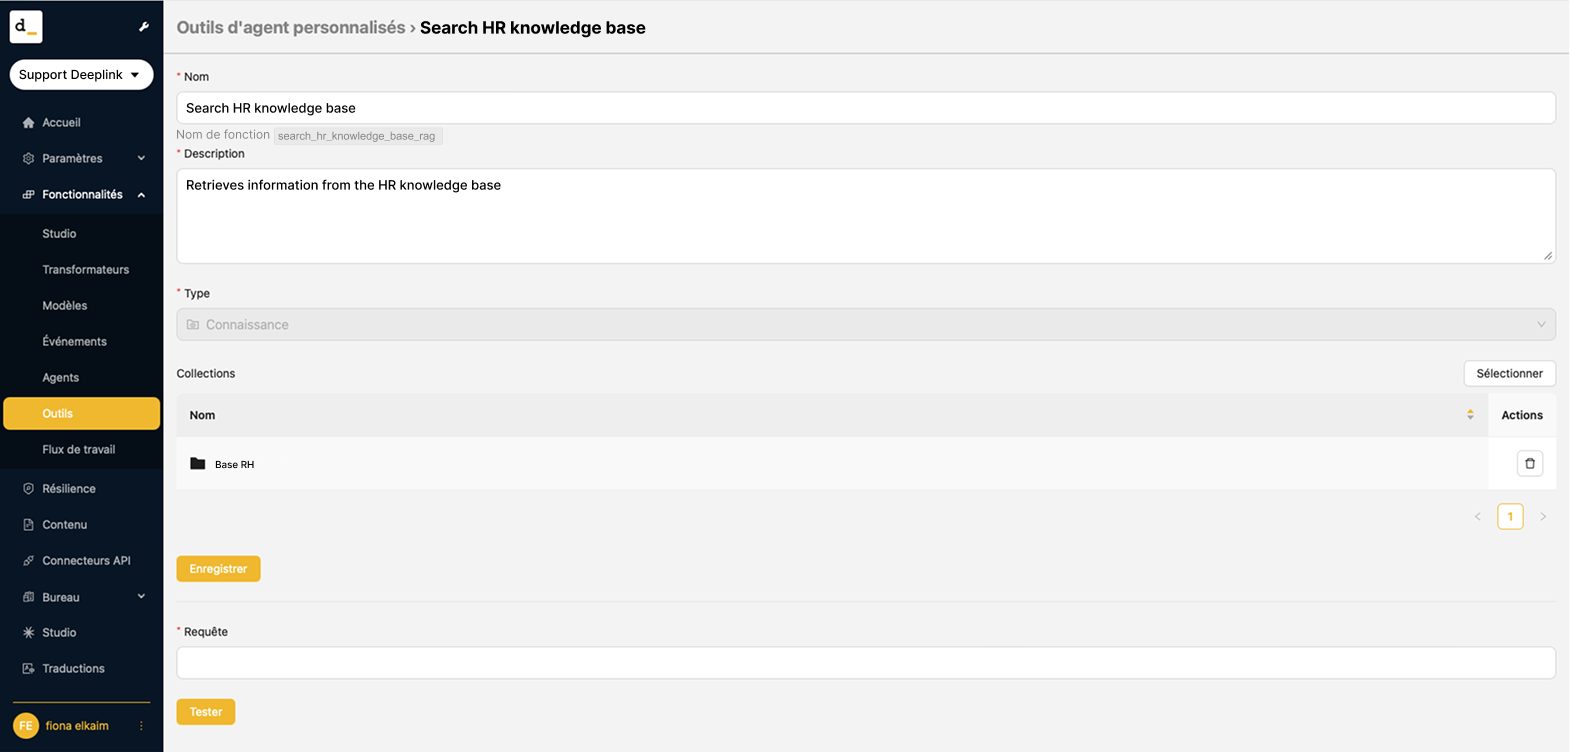
Go back to the “Tools” tab, click “+ Create” and create 2 new tools:
| Field | First tool | Second tool |
|---|---|---|
| Name | Search HR knowledge base | Search Legal knowledge base |
| Description | Retrieves information from the HR knowledge Base | Retrieves information from the Legal Database |
| Type | Knowledge | Knowledge |
| Collection | HR Base | Legal Base |
Choose the “Knowledge” type from the dropdown list. Then choose the collection from a second list, which shows the collections you created beforehand (in the “Content” tab).
Step 4: Give each expert access to its own base
- In the “Agent” tab, click “HR Expert”.
- Scroll down and click “Add tool”.
- Add the “Search HR knowledge base“ tool.
- Repeat for “Legal Expert” with the “Search Legal knowledge base“ tool.
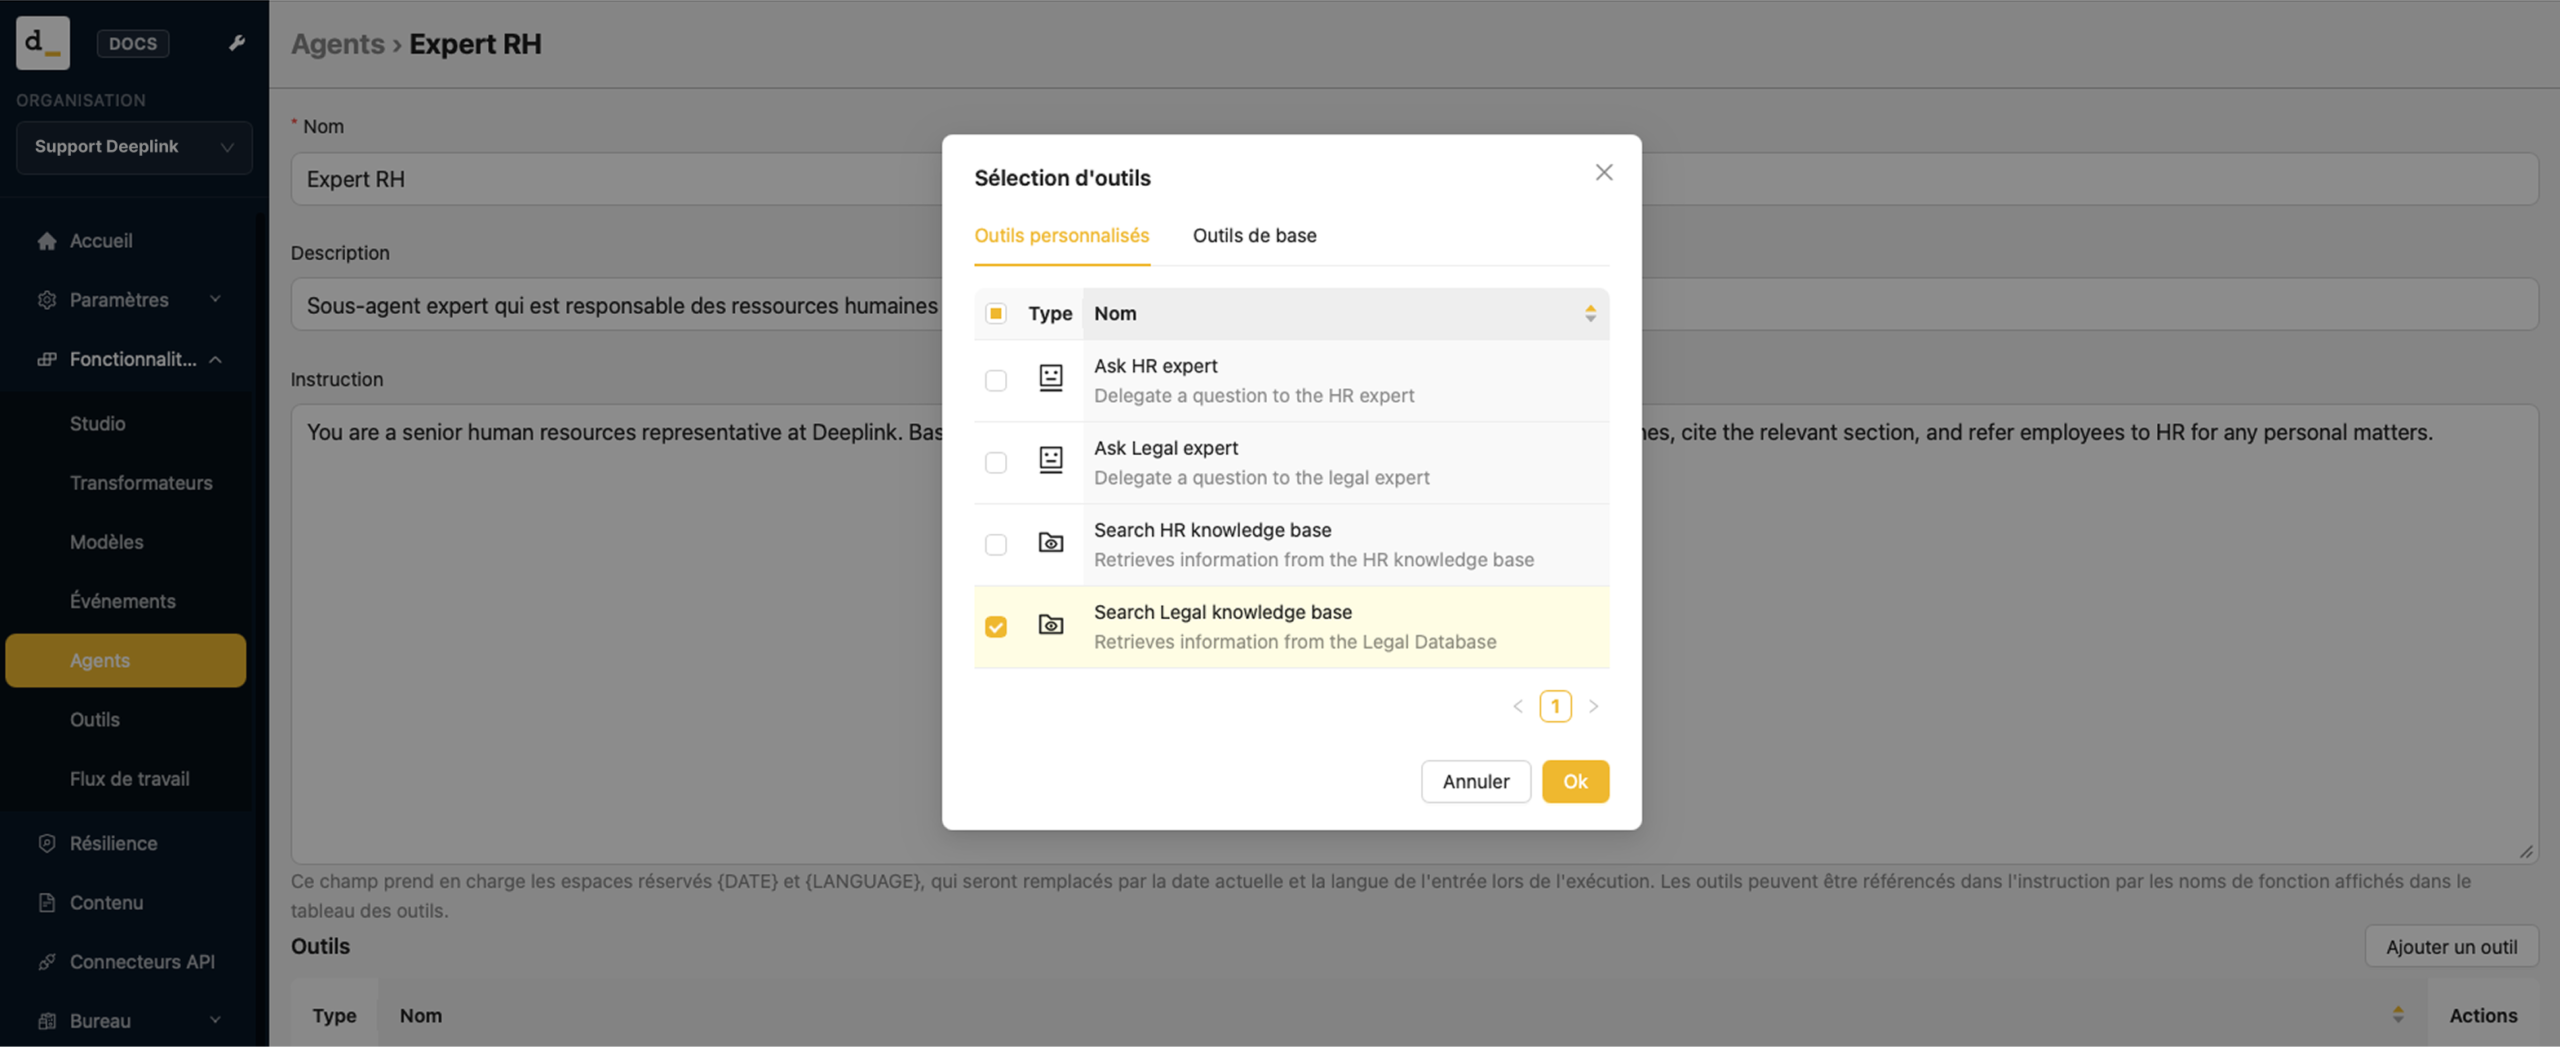
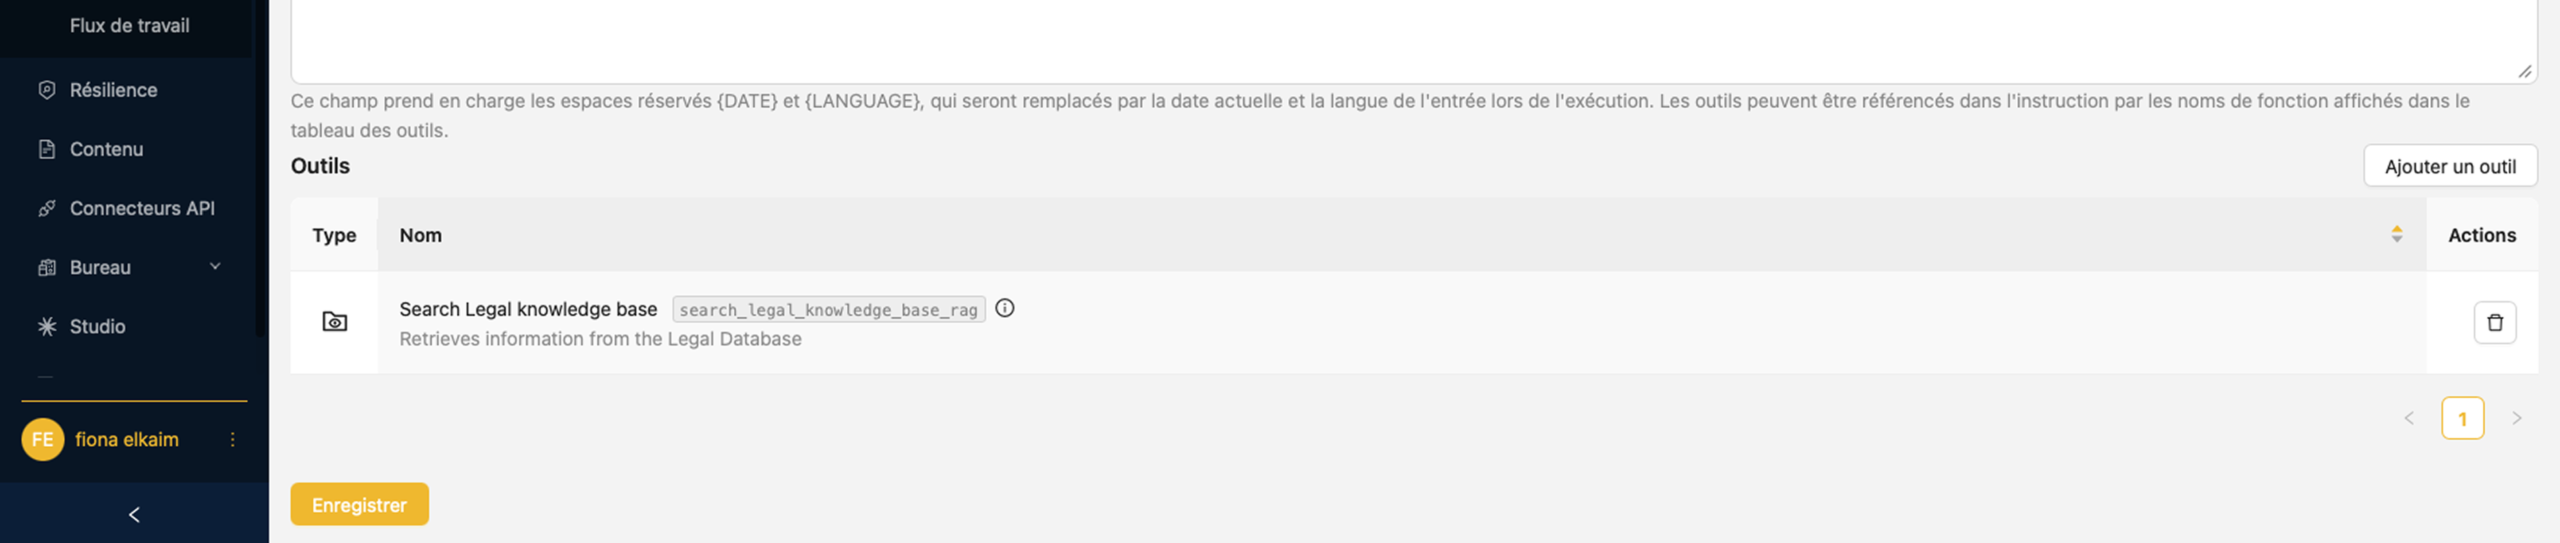
Each expert only has access to its own collection: the HR Expert can’t see the legal documents, and vice versa.
Step 5: Connect the main agent to its experts
- In the “Agent” tab, click “Support Team Assistant”.
- Scroll down and click “Add tool”.
- Add the “Ask HR expert“ tool.
- Add the “Ask Legal expert“ tool.
Step 6: Create the API connector
- In the “API Connectors” tab, create a connector and give it a name.
- Click the connector you just created.
- In the “Agent” dropdown list, choose “Support Team Assistant”.
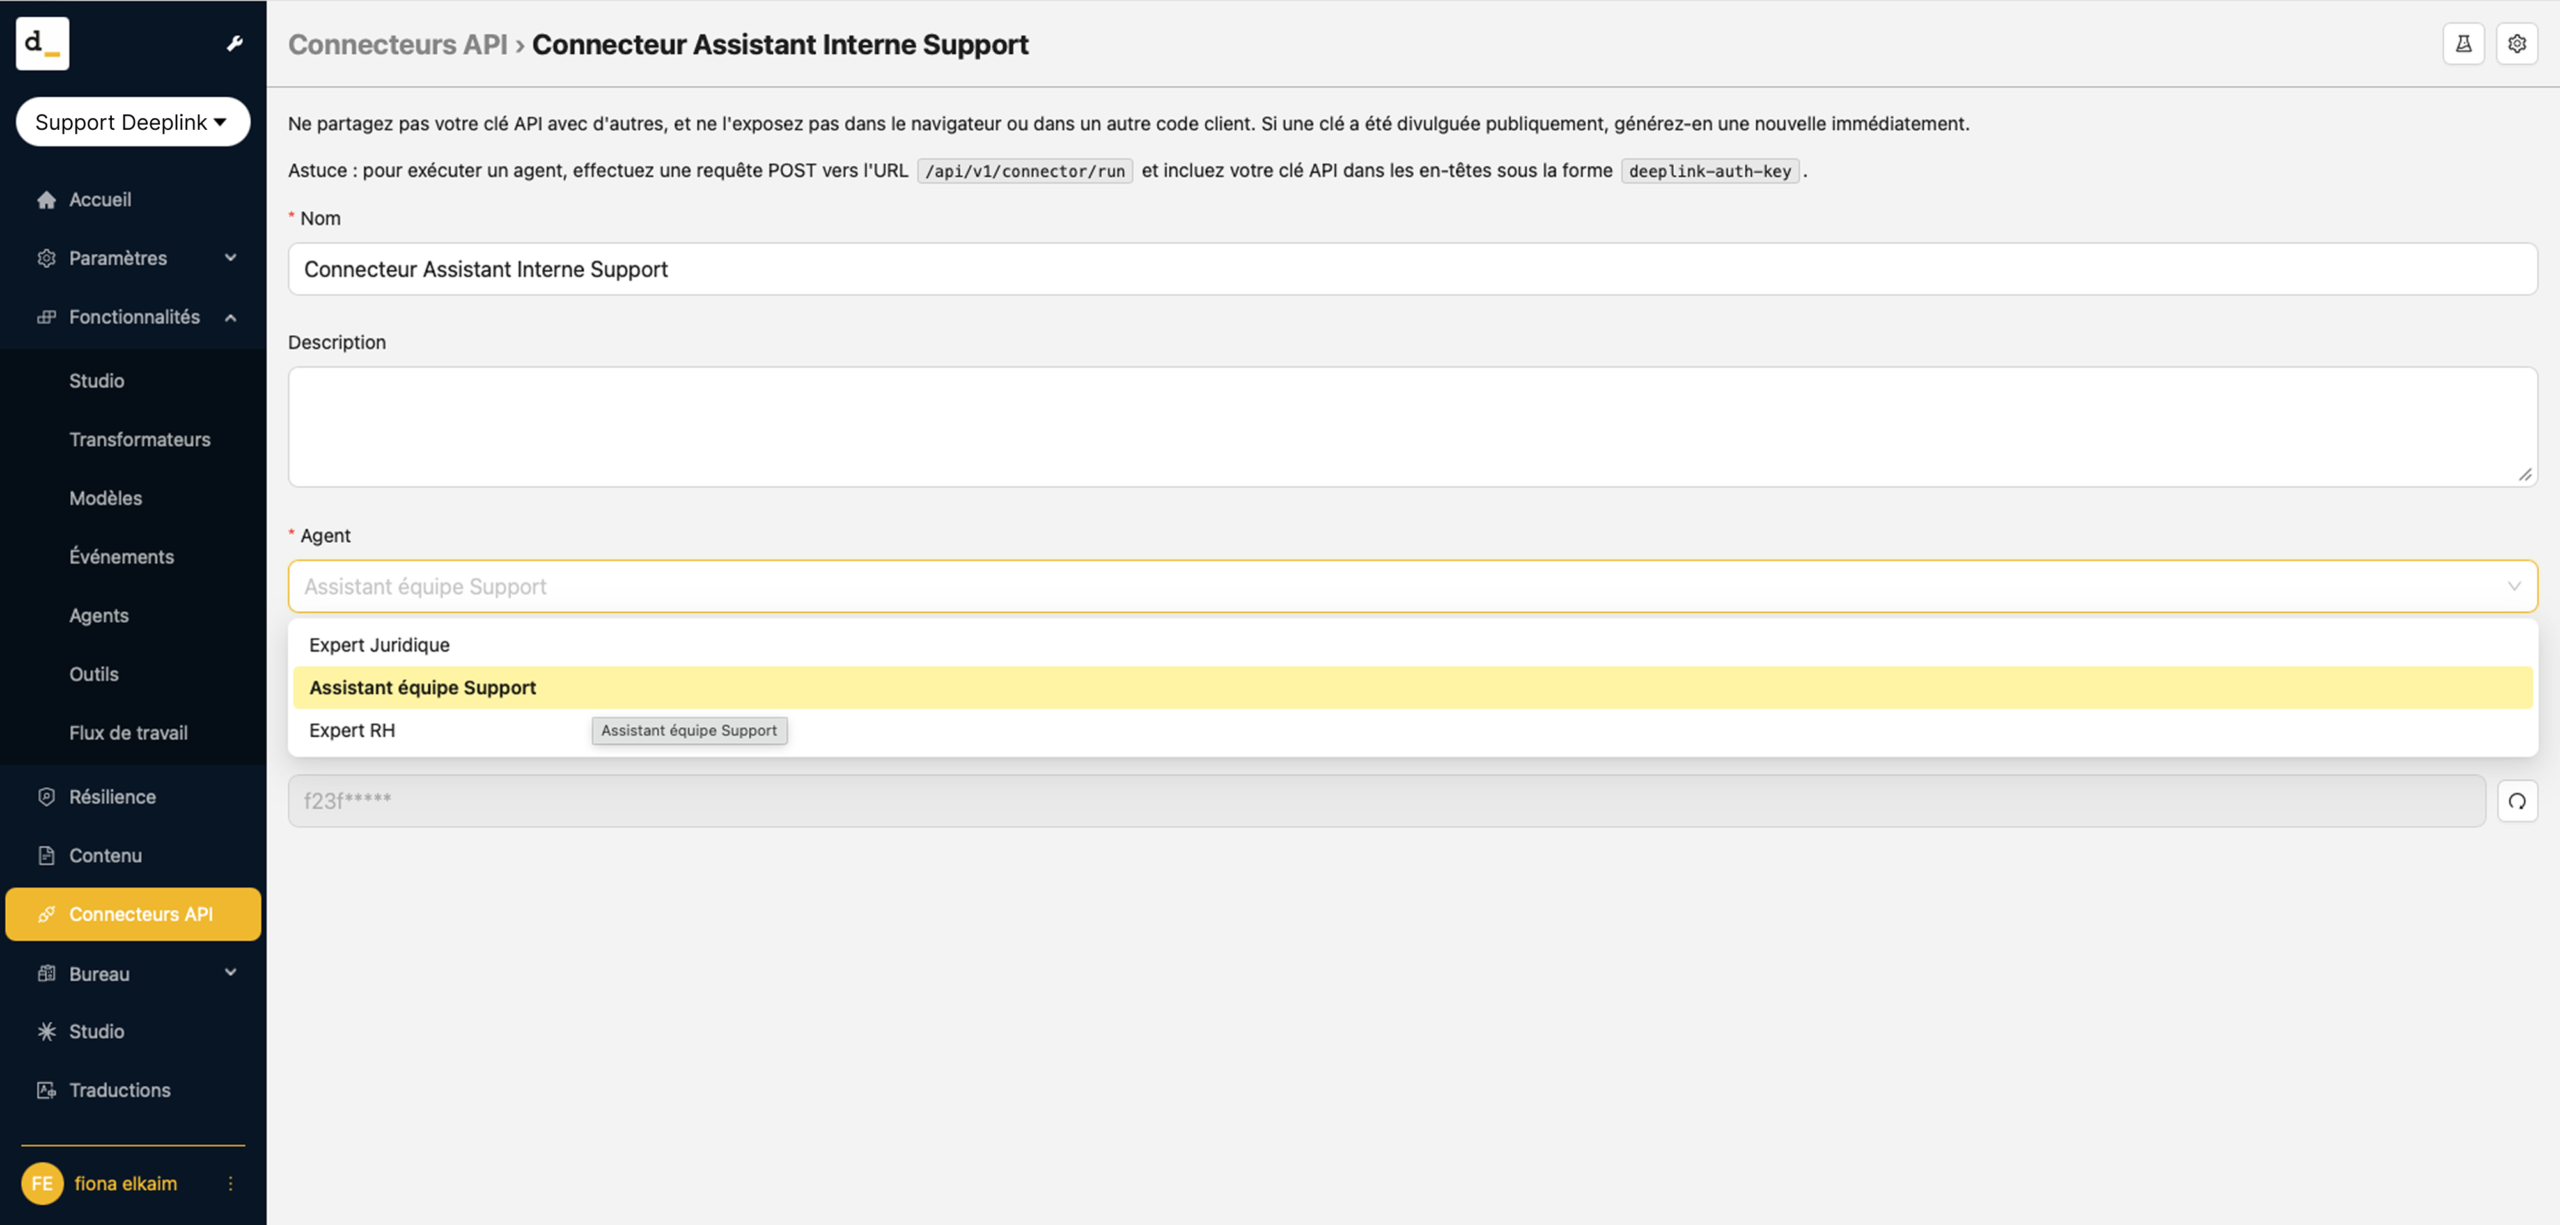
Make sure you select the main agent, not one of the sub-agents: it’s the main agent that distributes the questions among the experts.
Step 7: Ask your questions in a Chatbot or in Studio
In Studio
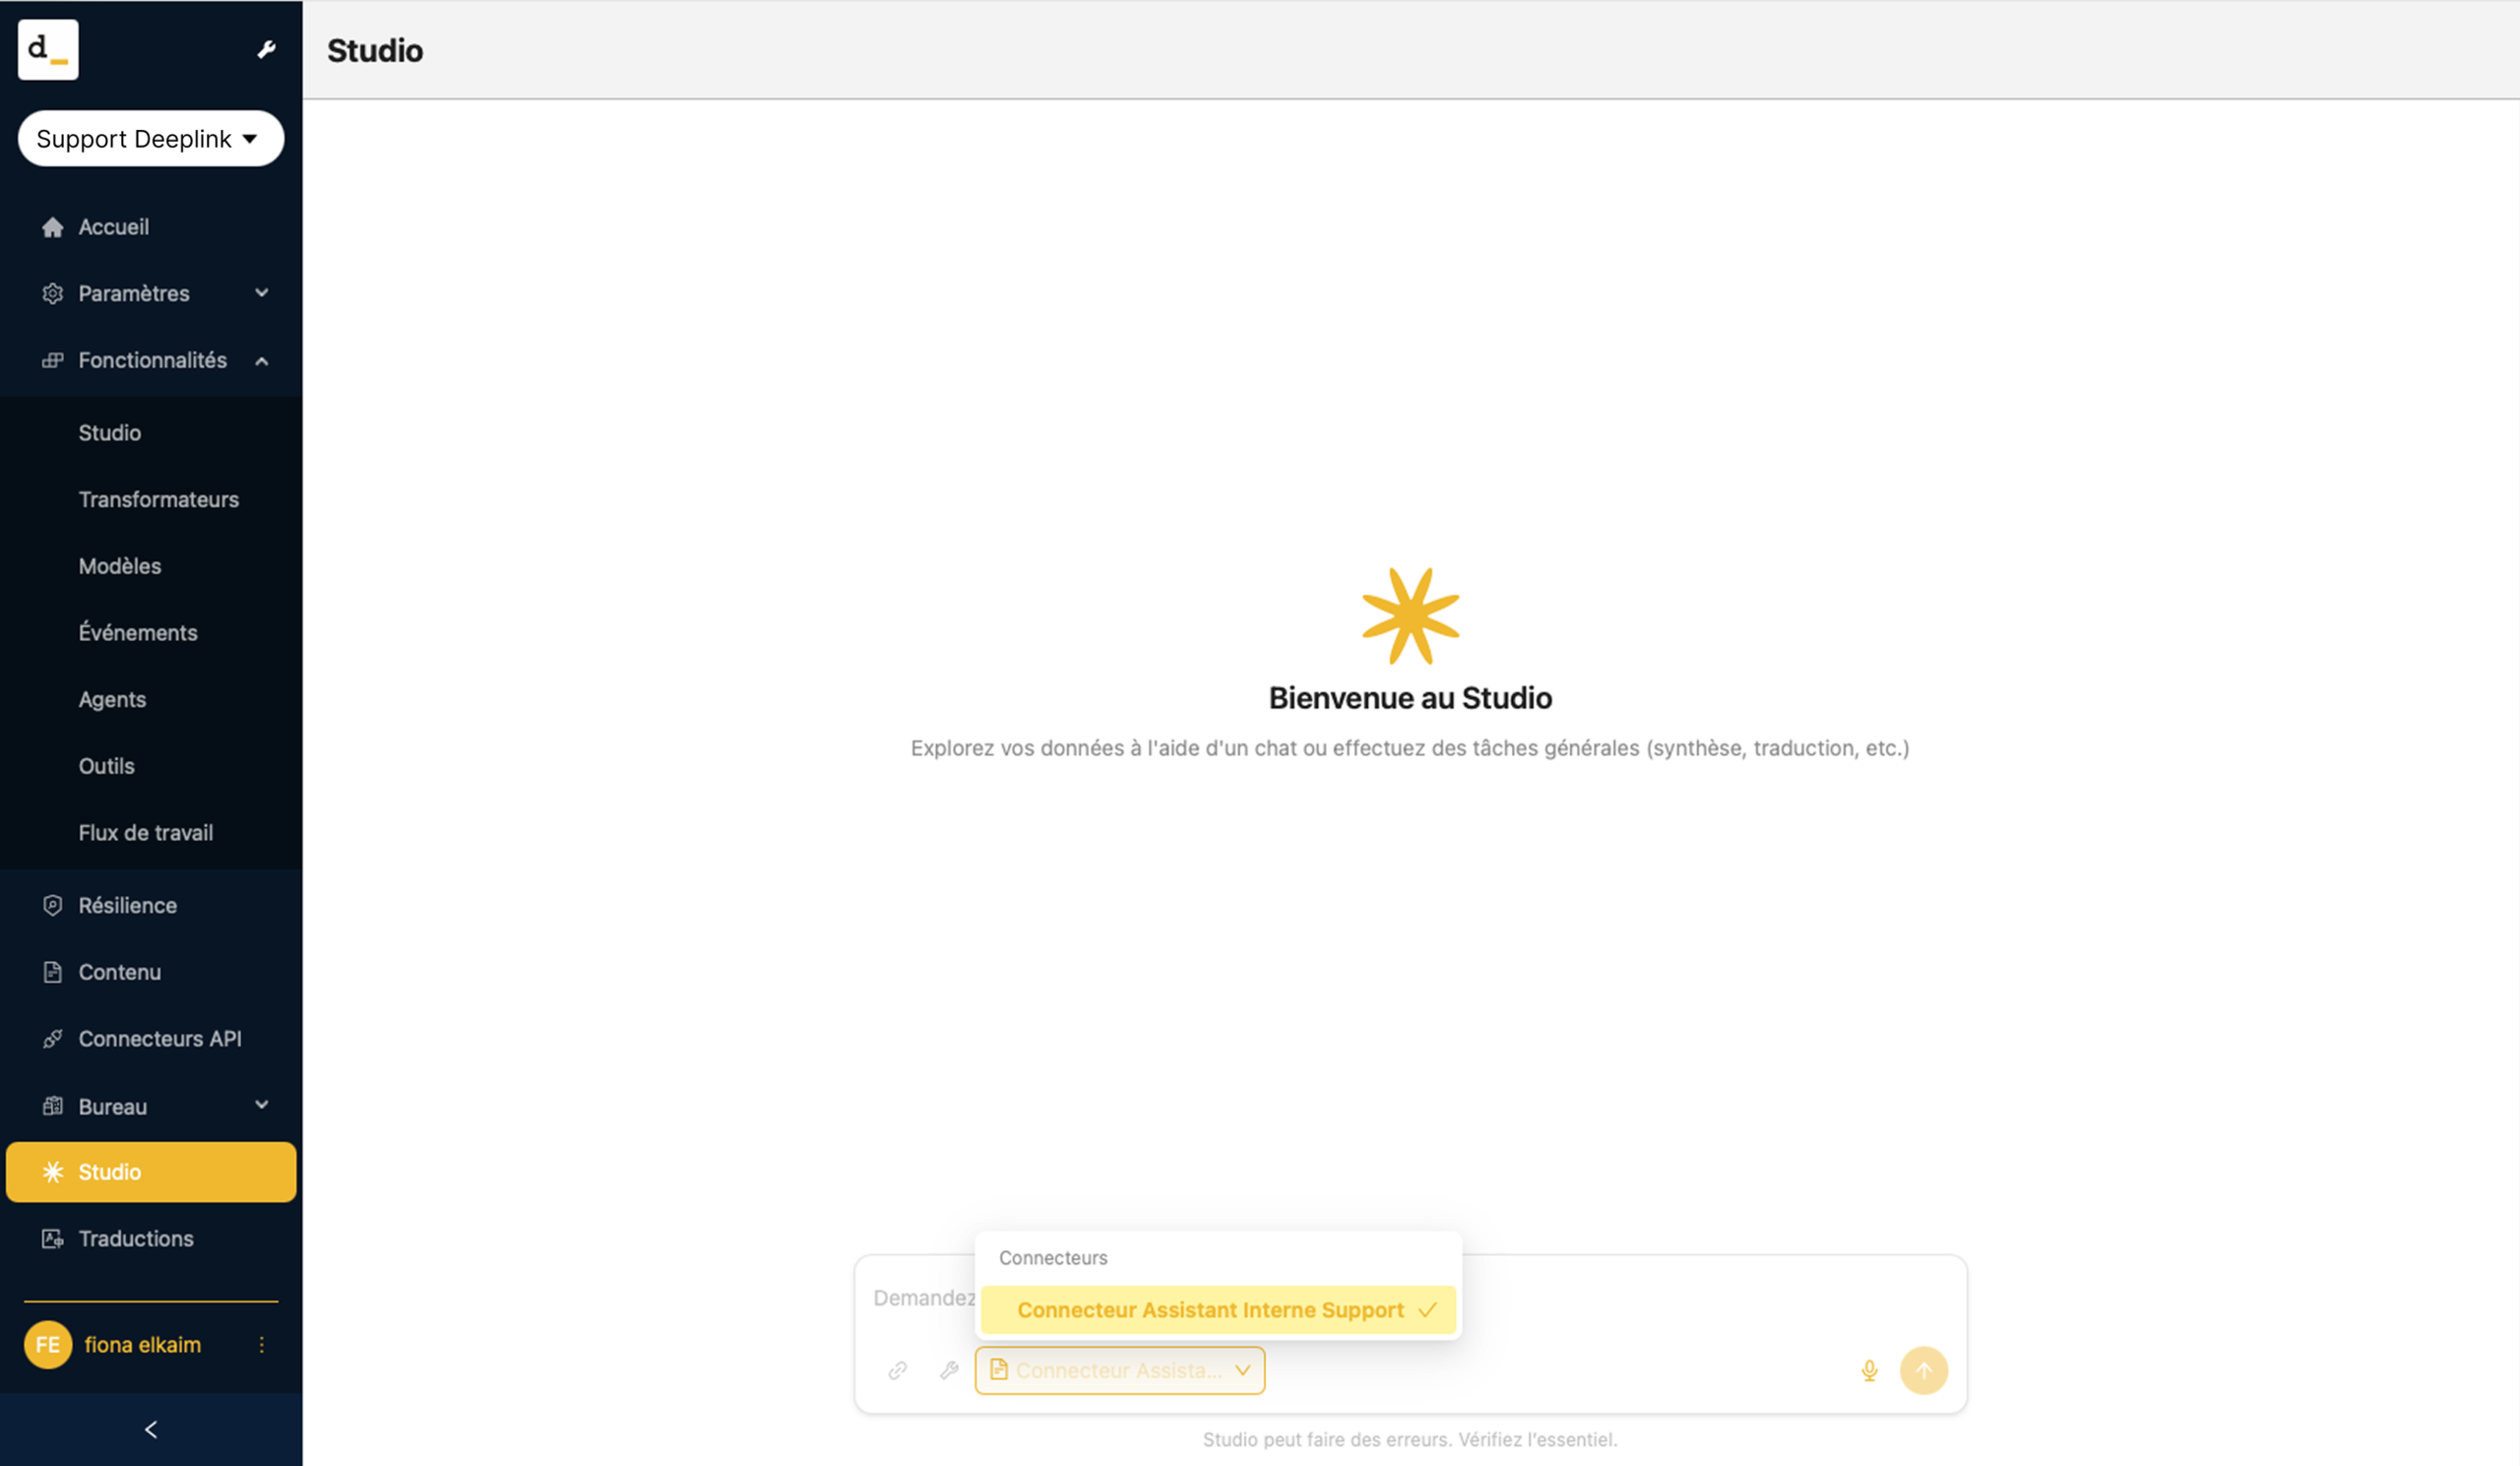
- Open the “Studio”.
- In the prompt input settings, choose the scope.
- Select the “Support Team Assistant Connector”.
- Ask your question.
In a Chatbot :